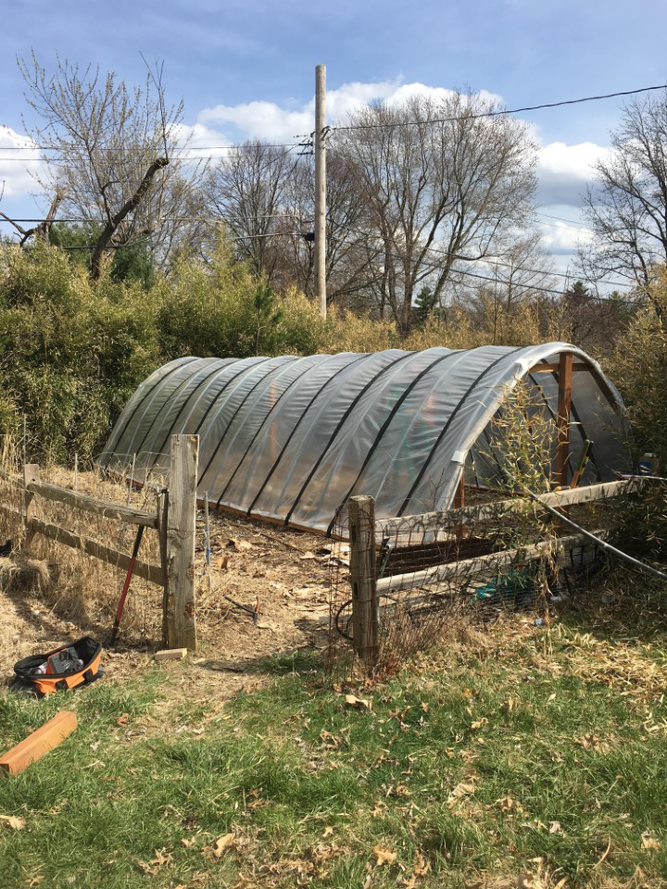
Assembling a Hoop House on Your Property
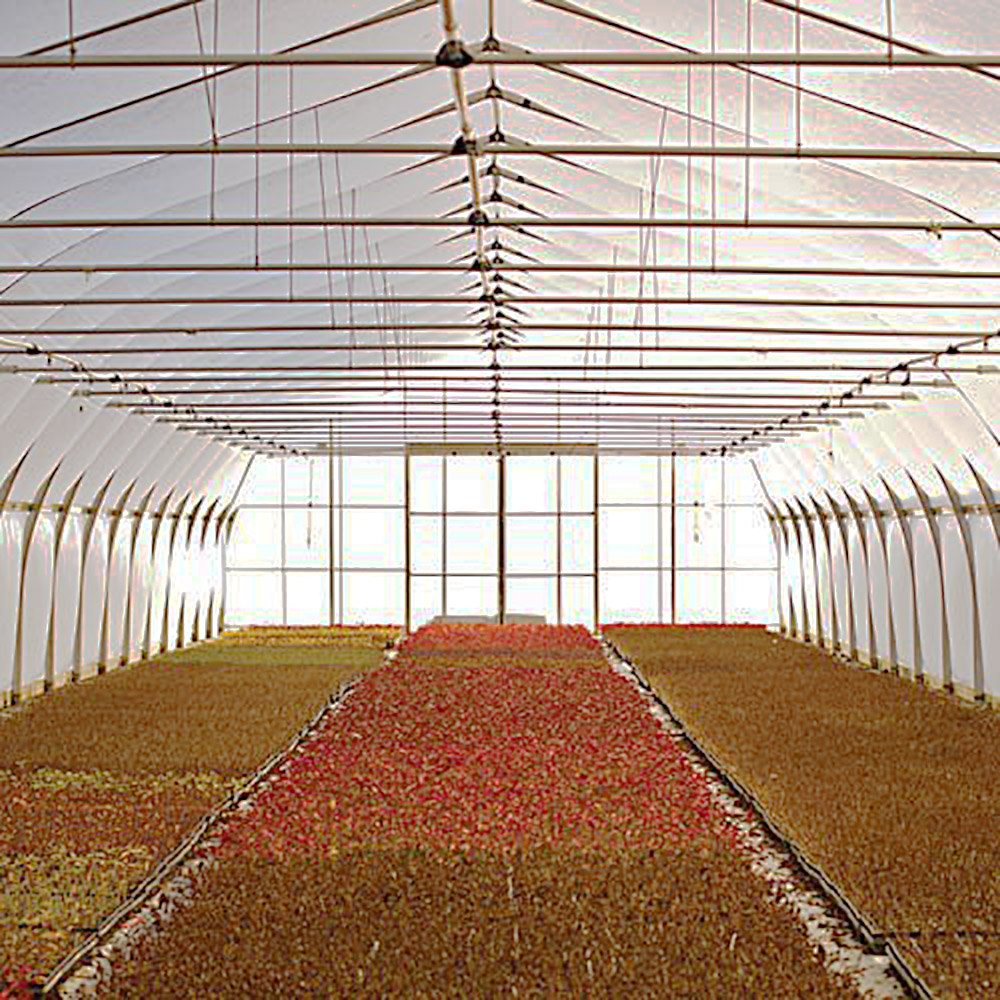
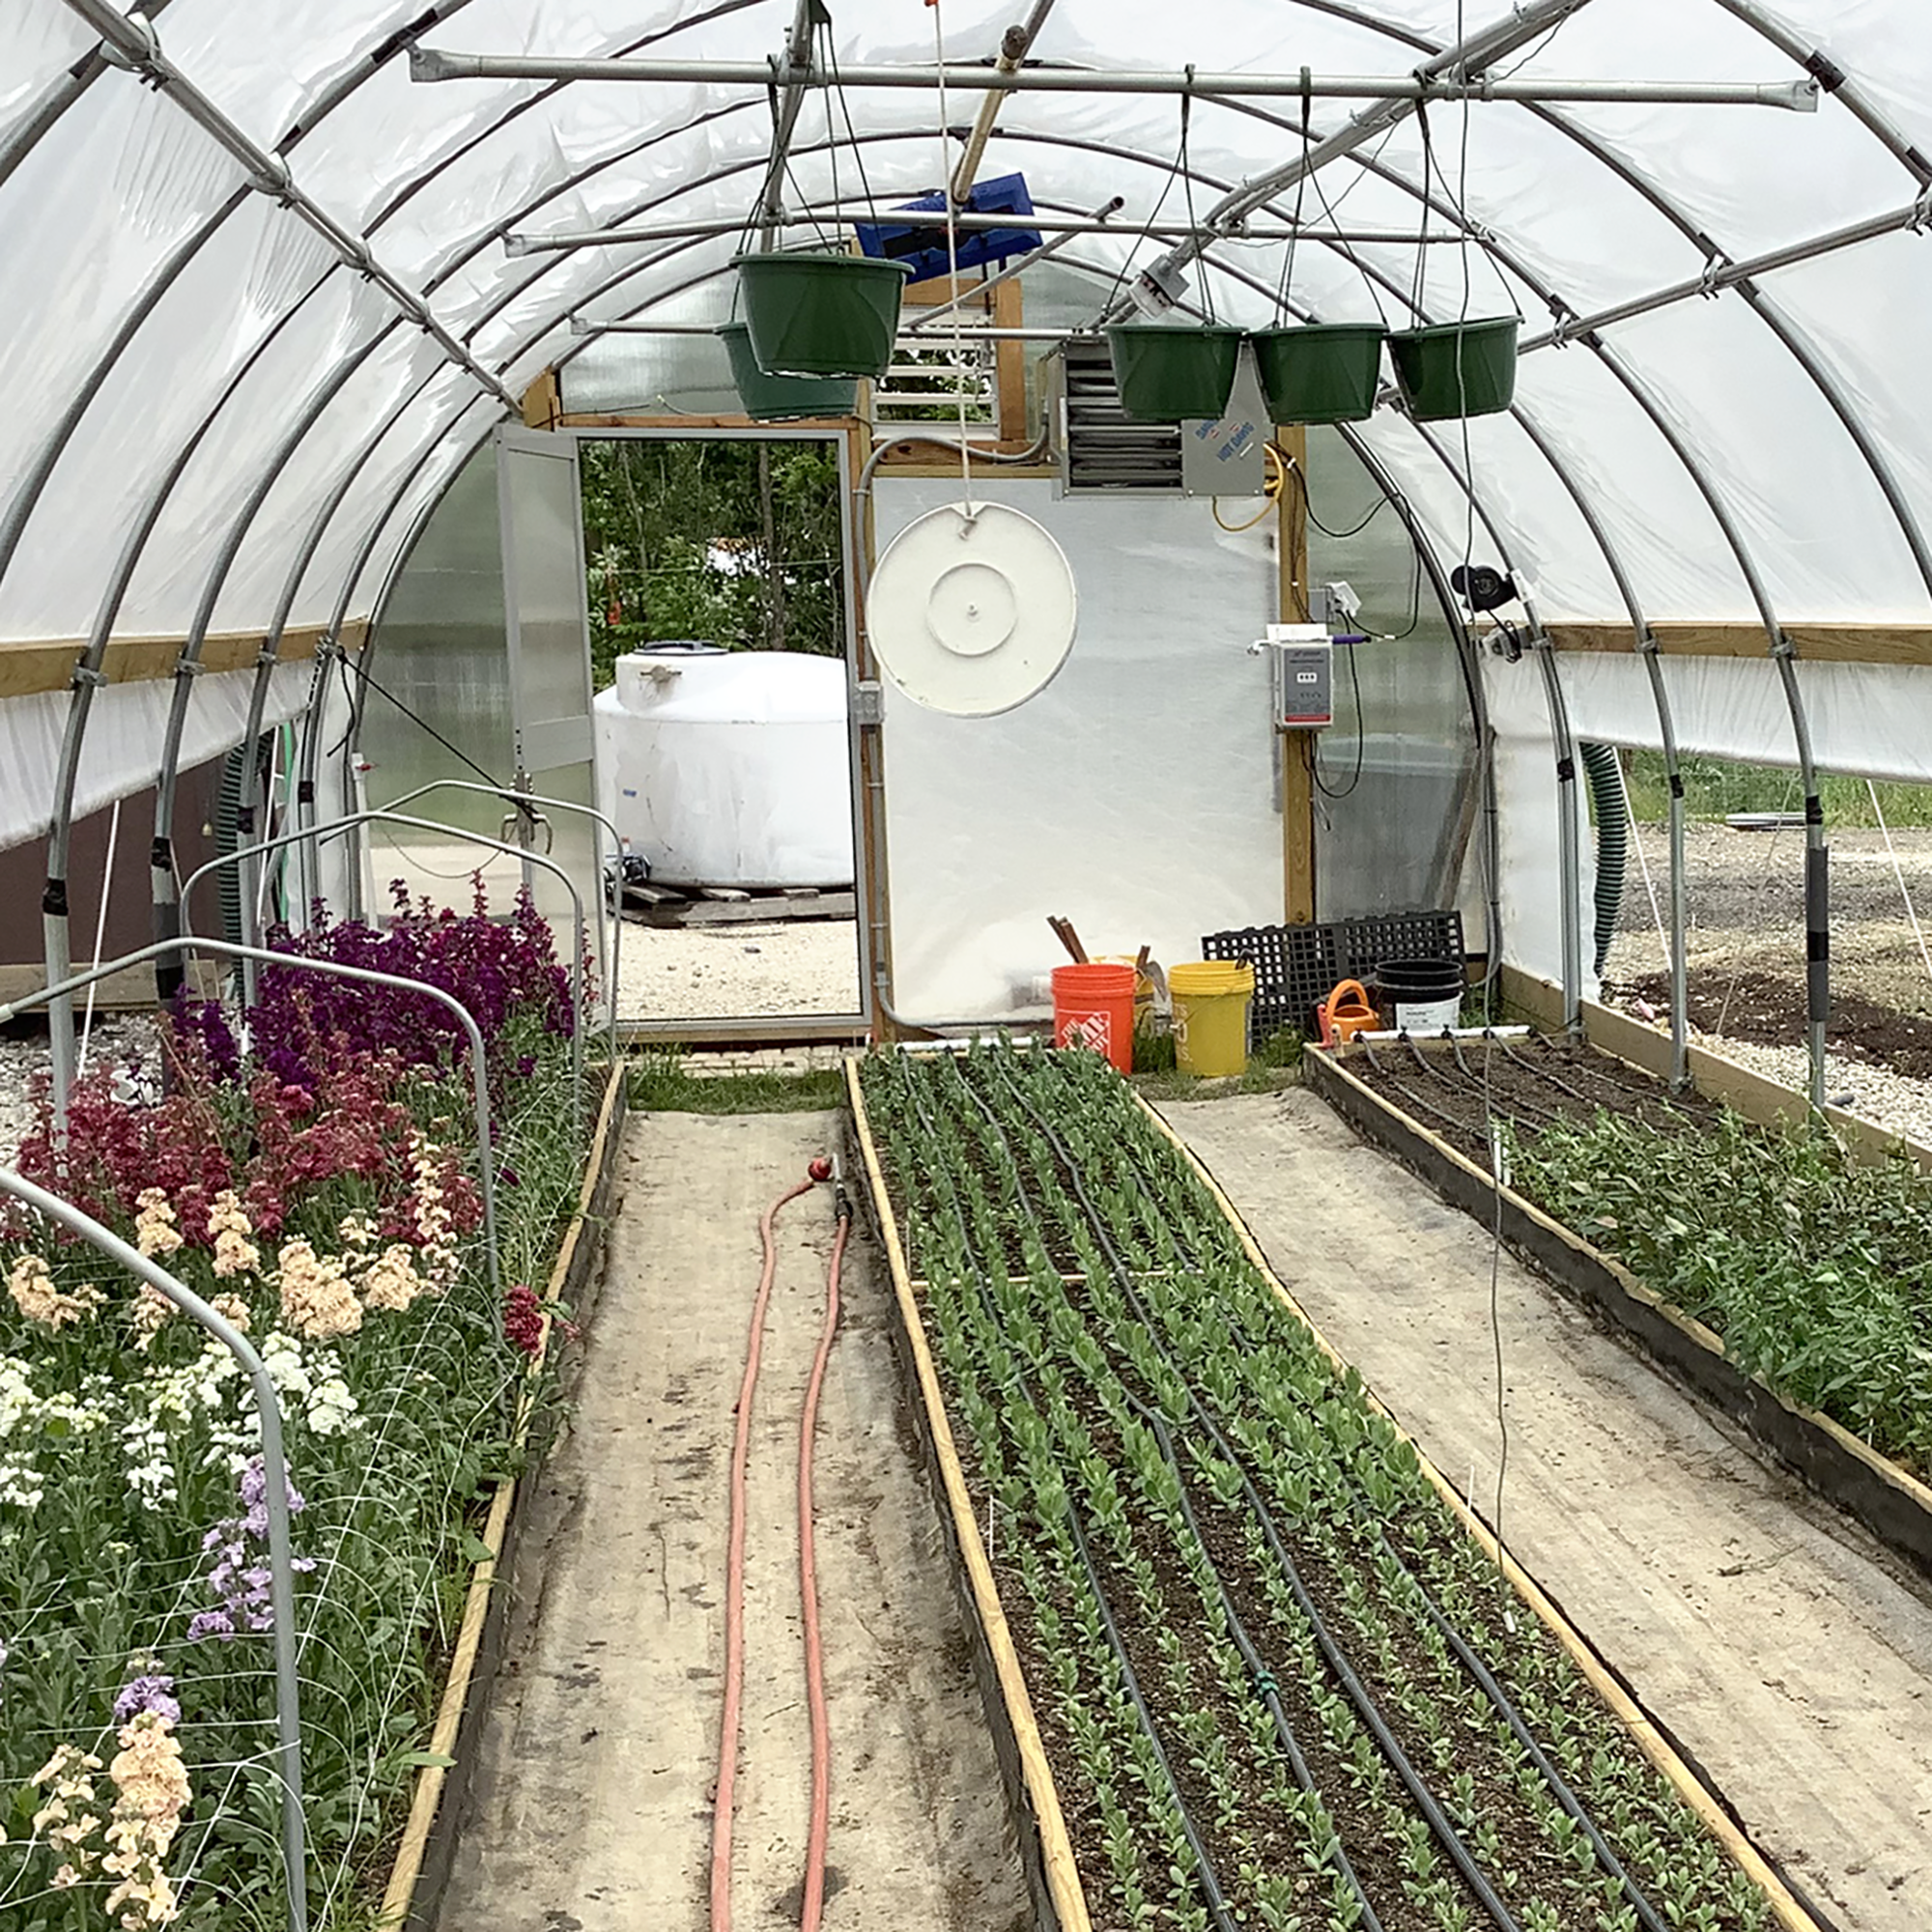
Hoop houses are structures designed for growing plants. Hoop houses are a great alternative to a greenhouse; they are smaller, less complicated to install, and are typically cheaper in terms of required material. Hoop houses are designed for crop protection and season extension rather than year-round growing. These structures are best for crops that do not necessarily require heat or humidity, such as leafy greens, root vegetables, herbs, and some vine crops.
If you are looking to extend the growth season of your plants without the extensive size, cost, and installation of a greenhouse, a hoop house might be what you are looking for. Below, Jiggly Greenhouse has composed assembly and installation instructions to make building a hoop house a DIY project. While it may look overwhelming, many steps are very simple; we like to be thorough. Additionally, you will find additional resources and a collection of materials you will need to build your hoop house.
Building A Hoop House
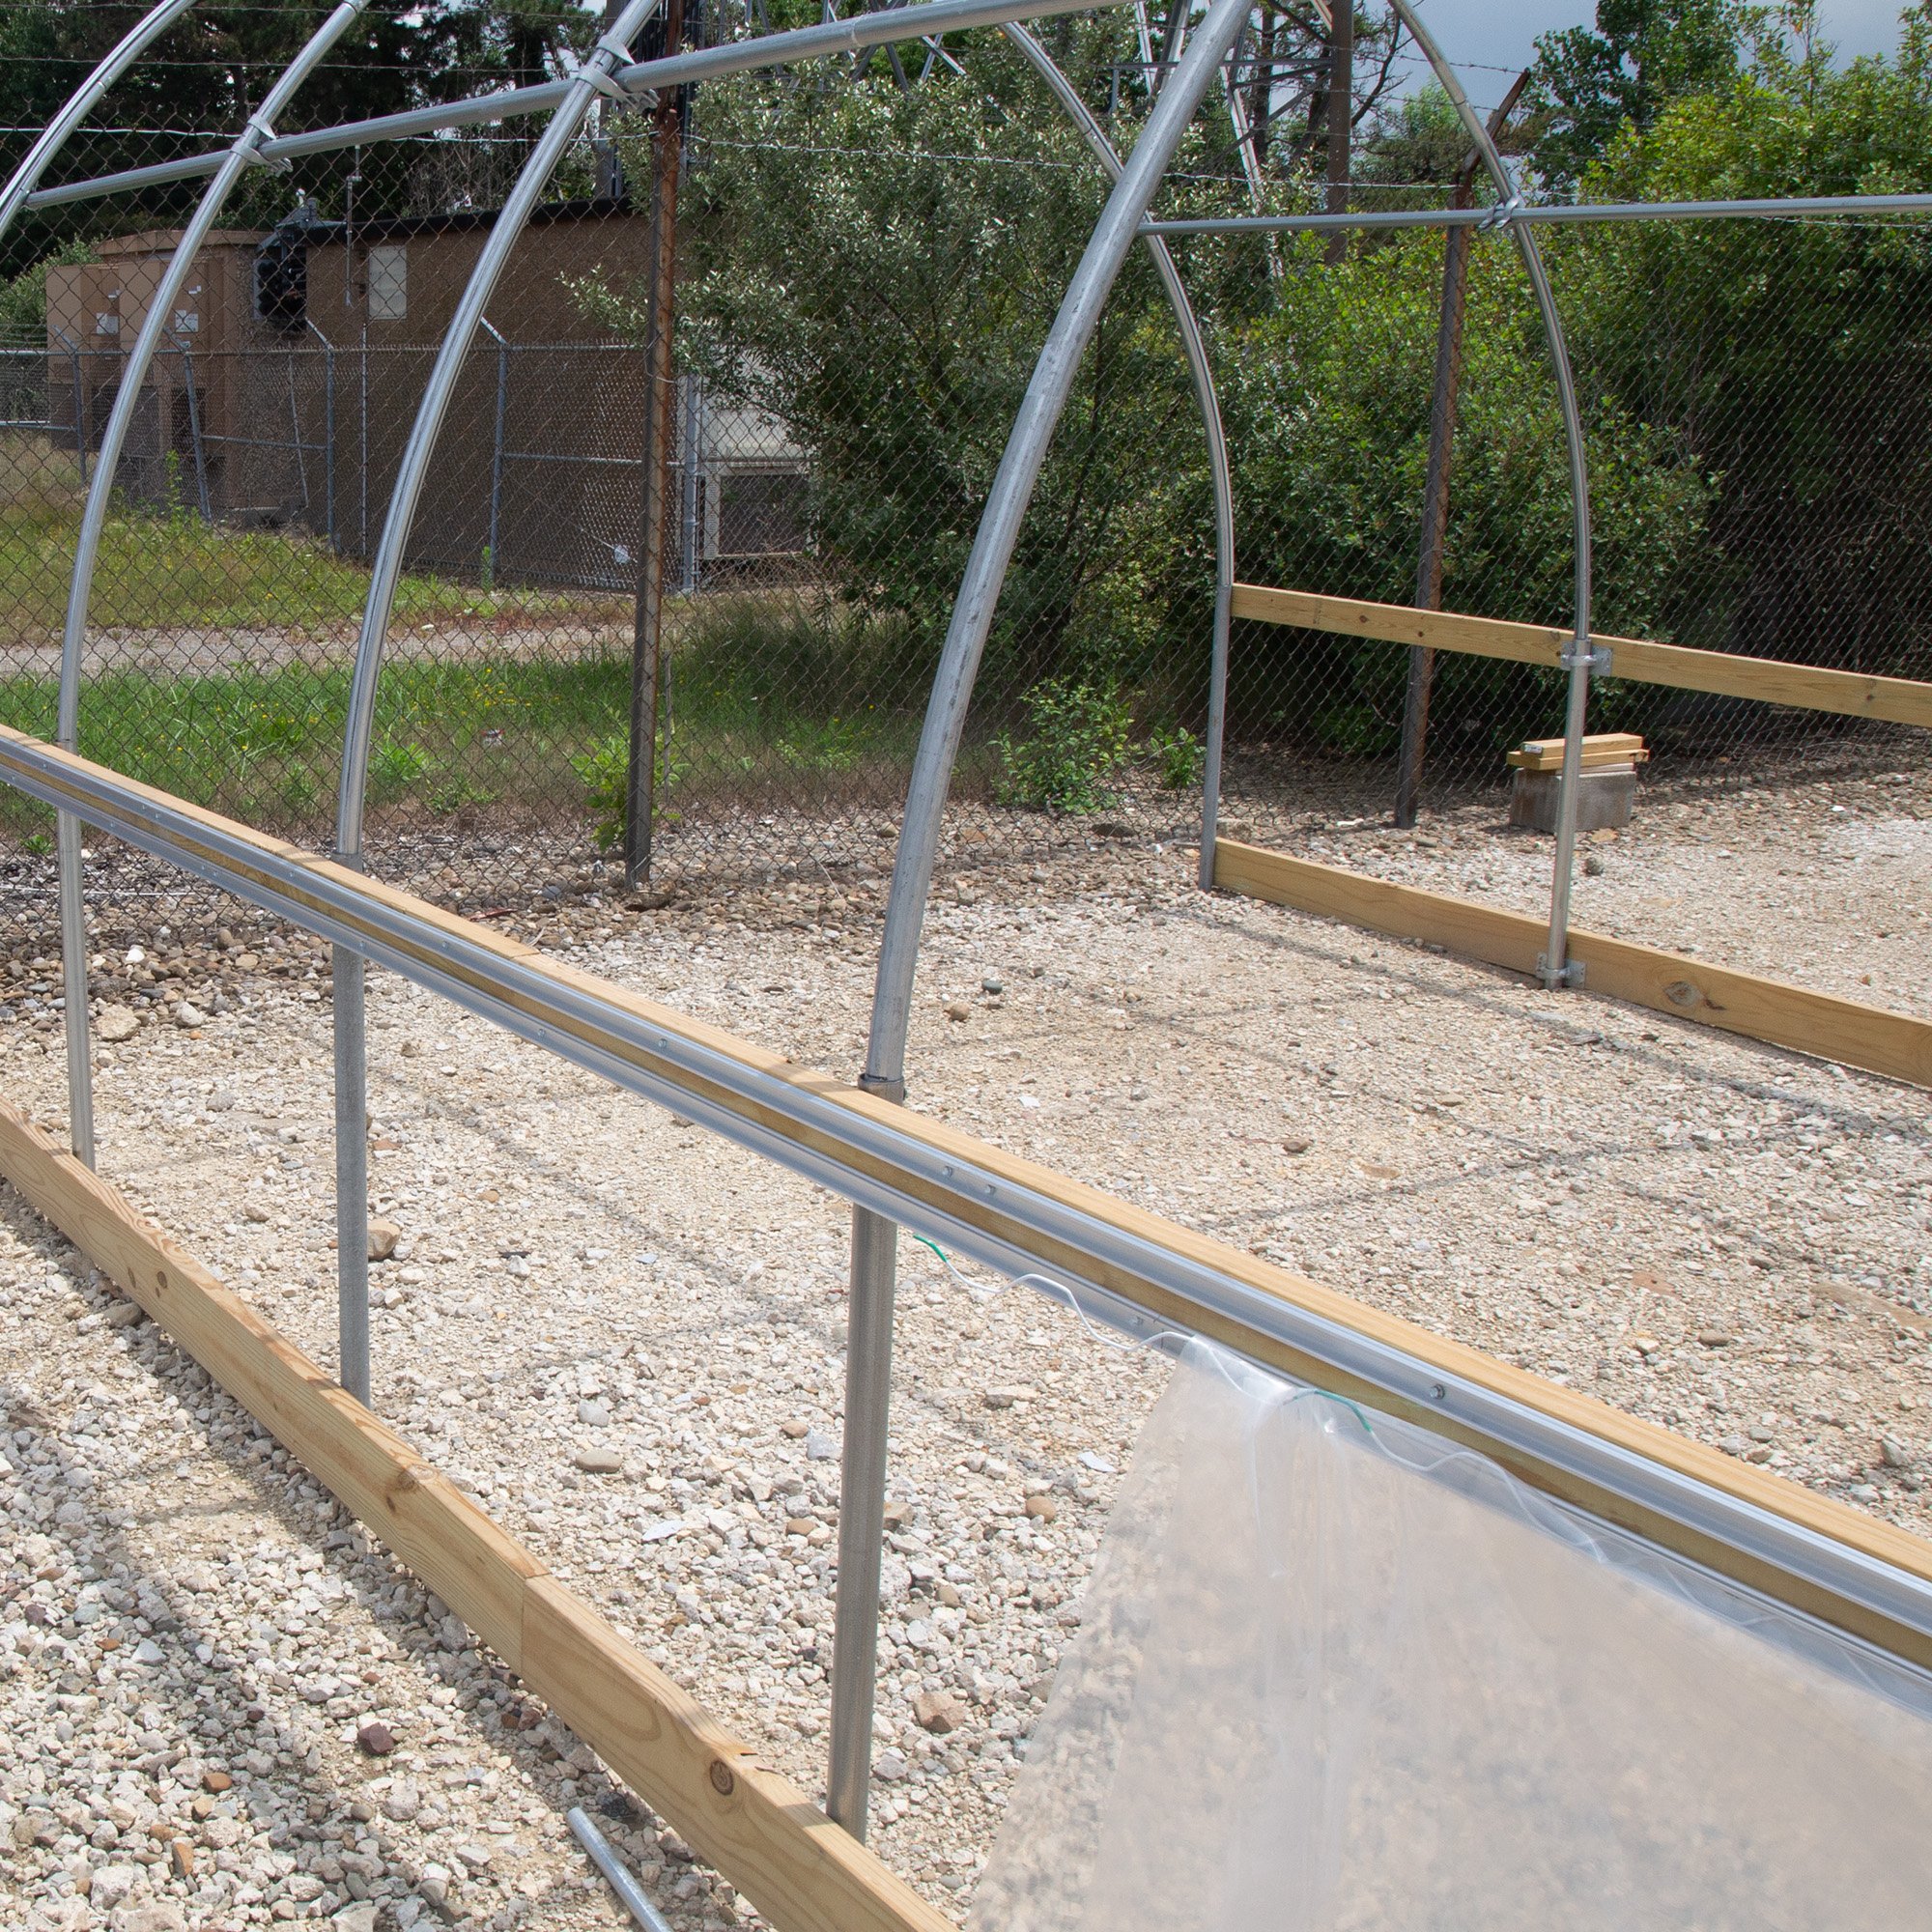
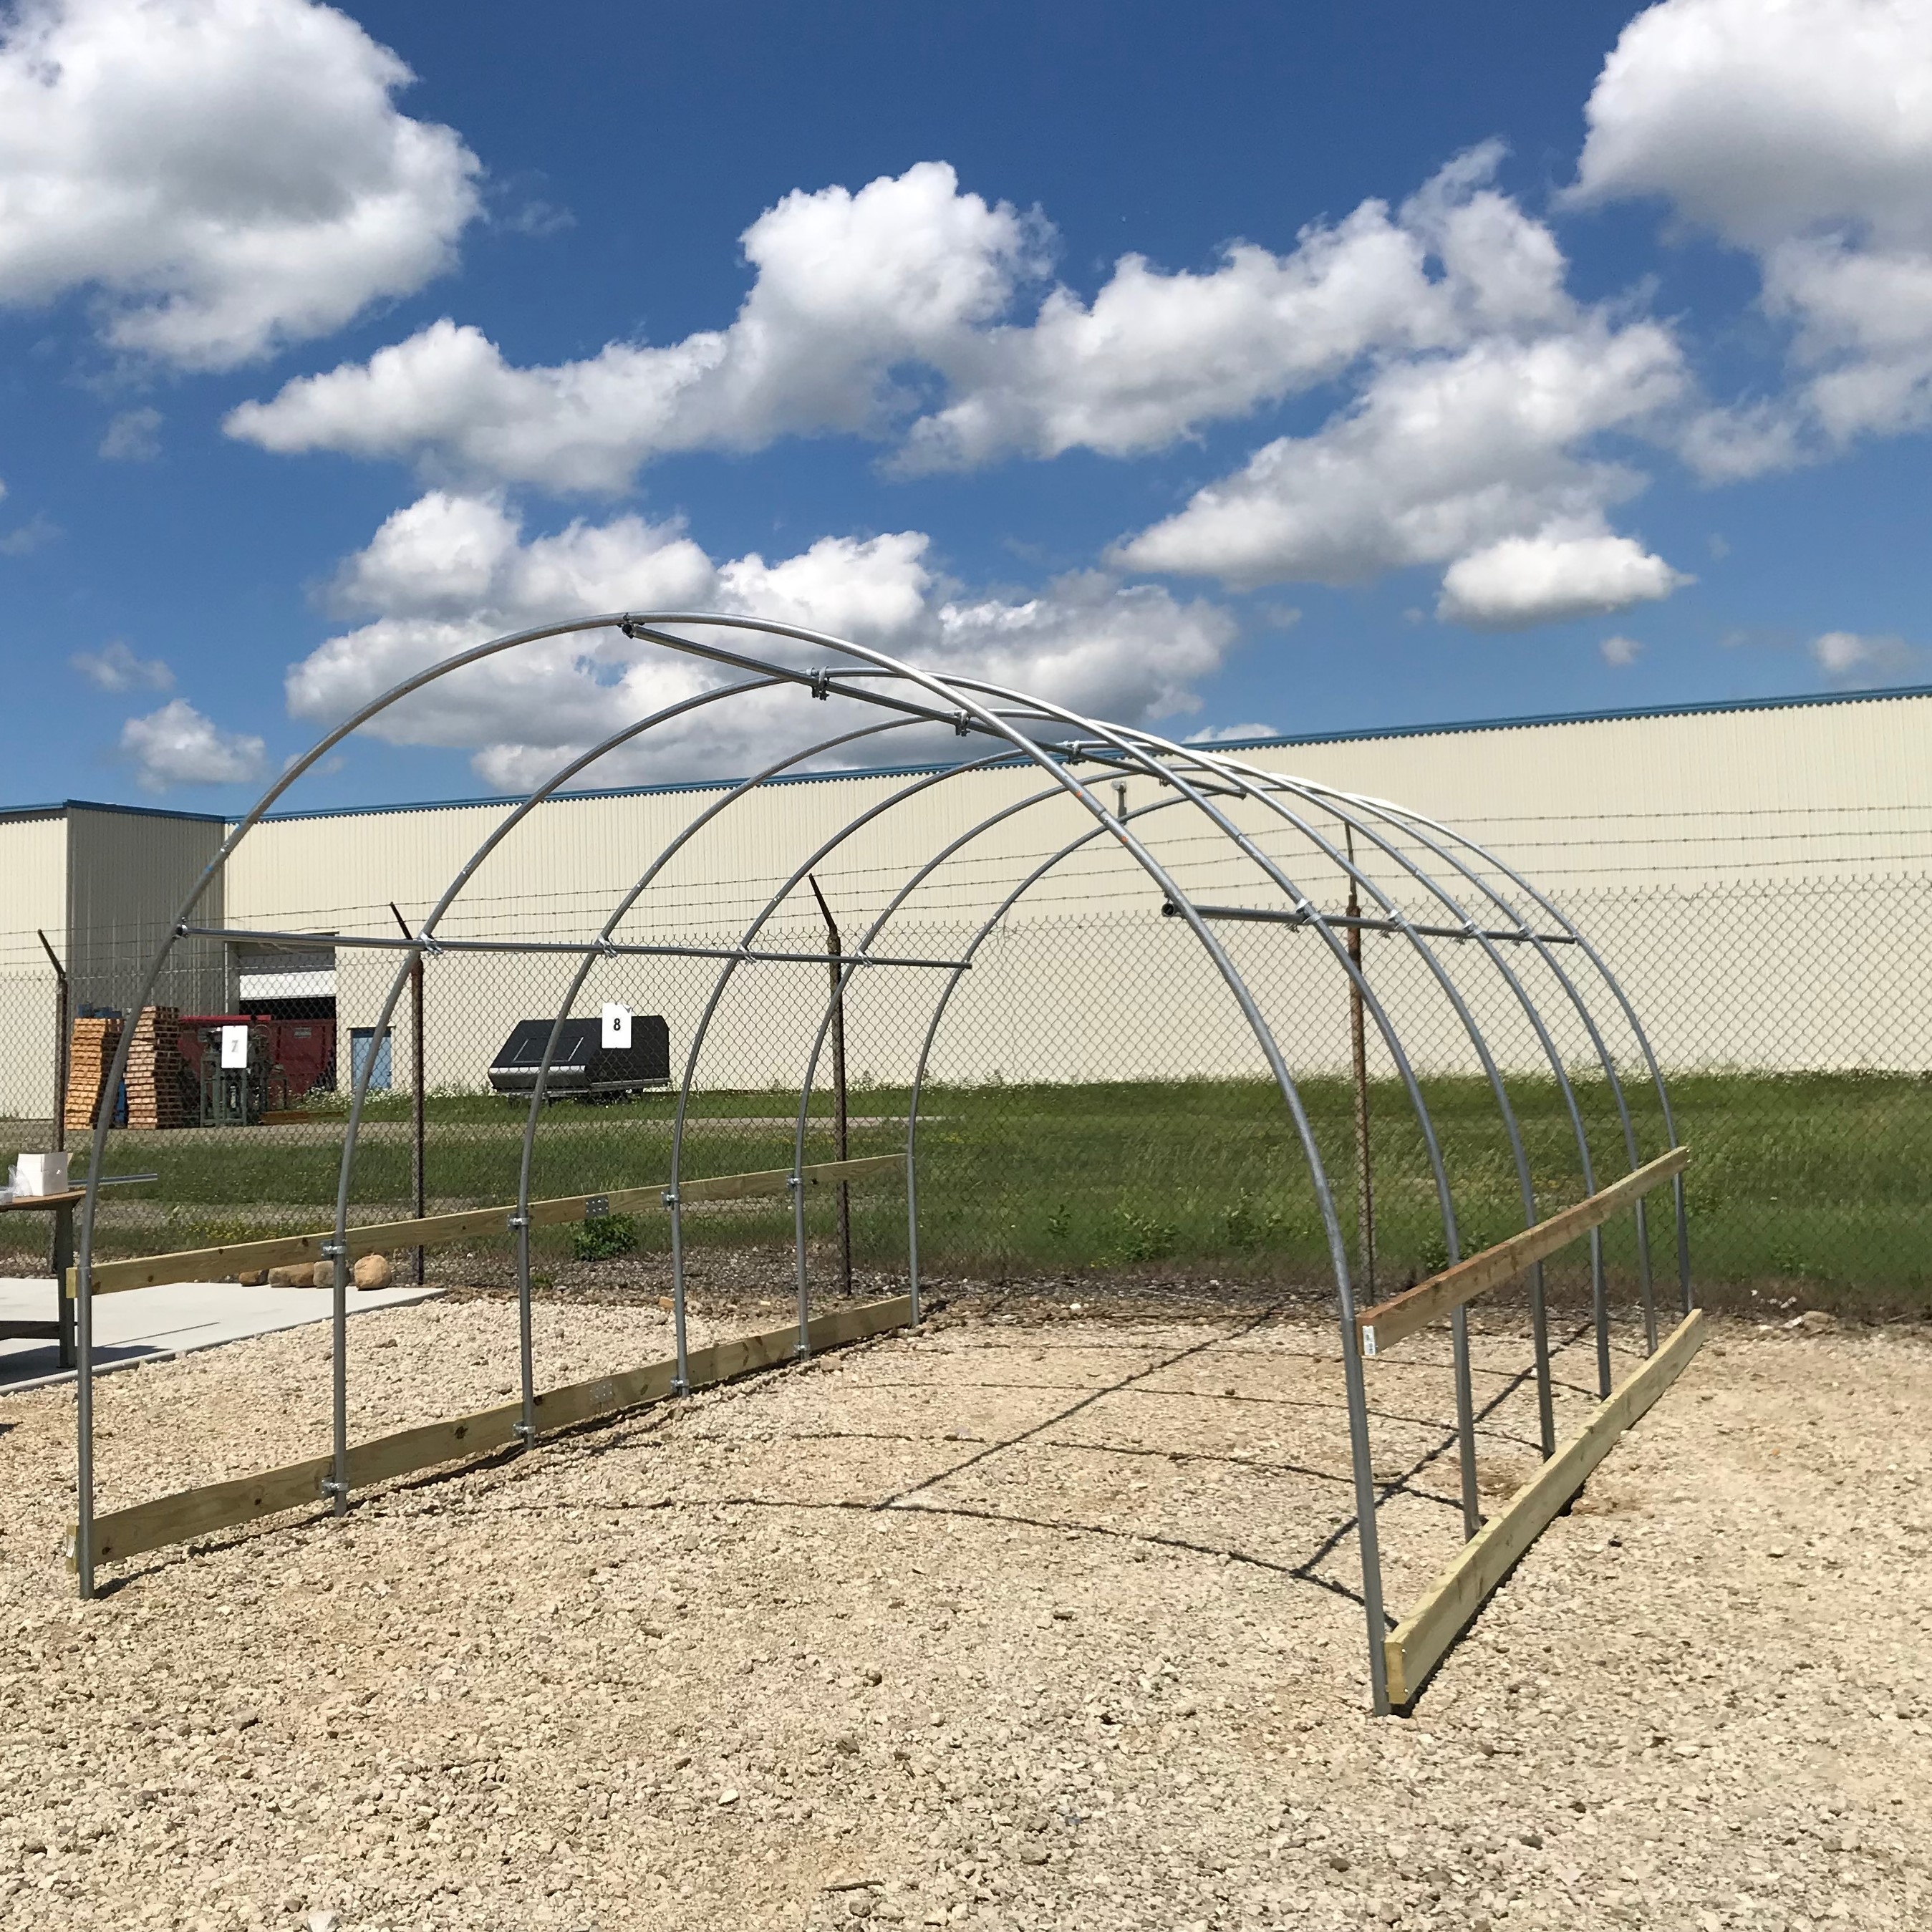
- Step 1: Lay out the arched frame on the ground.
- Step 2: Mark 6” from the end on either side of the arched frame.
- Step 3: Mark 6” from the top on the support posts.
- Step 4: Connect the swedge ends of the arched frame.
- Step 5: Use Tek Screws to secure the arched frame connections.
- Step 6: Mark the center at the top of the arched frame.
- *Repeat Steps 1-6 for as many arched frames as needed.
- Step 7: Place the support posts 4’ apart (from center to center of the support posts’ center) in a straight line. Install using Post Pounder or sledgehammer.
- *Repeat Step 7, 13’ parallel of the first line of support posts.
- Step 8: Slide the arched frames into the support posts down to the 6” mark.
- Step 9: Secure each arched frame to its support posts using Tek Screws.
- *Repeat Steps 8 & 9 as many times as necessary.
- Step 10: Attach Top Wood Adapter Brackets to each support post at the connection point to the arched frame.
- Step 11: Attach Purlin Brackets to the center point of each arched frame, which should have been marked in Step 6.
- Step 12: Insert the Top Center Brace through the Purlin Brackets.
- Step 13: Install Side Braces. Place 1’ below the connections of the middle of the arched frame to the left and right swedge arches of the arched frame.
- *Repeat Step 13 on both sides of the arched frame, except for the last arches on either end. You will want to use Pole Straps at the ends.
- Step 14: Insert the side braces or side purlin.
- Step 15: Cut the excess from the center and side braces/purlin.
- Step 16: Attach the Bottom Wood Adapter Brackets & ensure they are level.
- Step 17: Attach Side Wood Adapter Brackets & ensure they are level.
- Step 18: Attach the wooden bottom and side rails using self-tapping screws, & ensure they are level.
- *Repeat Steps 16-18 on all posts.
- Step 19: Install Jiggly Wire U-Channels to the side rails on both sides of the arched frame. *If you choose to have ventilation through only one side of the hoop house, attach these U-Channels on the bottom rail of one side as well.
- Step 20: Install Manual Hand Crank Winch.
- Step 21:Install Greenhouse Plastic.
- Step 22: Enjoy Your New Hoop House!
Jiggly Greenhouse has also compiled images to show the hoop house installation process, which can be found here.
Required Materials
- Plain Arch
- Swedge Arches
- Greenhouse Plastic
- Tek Screws
- Crank & Clamps
- Purlin Brackets
- Side Straps
- Jiggly Wire
- Jiggly U-Channels
- Caps
- Couplers
- Post Driver
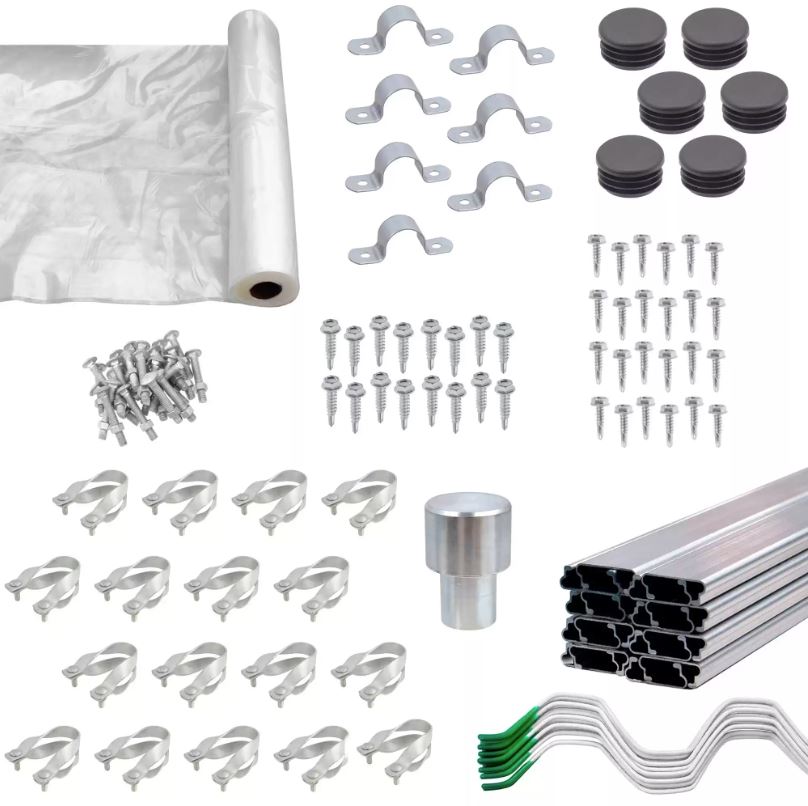
All of these products are available individually, however we do also offer the Greenhouse Frame Hardware Kit or DIY Greenhouse Kits.
If you have any further questions about installation or materials, please check out our Resources Hub or get in touch with our sales representatives. They are happy to help in any way they can!
Resources Hub Contact Us